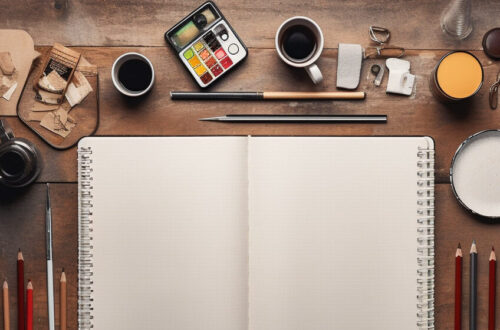
How to Start and Finish Your Painting, Nine Practical Steps
Paintings often have no definitive end point. Deciding when a piece of work is finished can be a challenging task for even the most experienced artist. However, many paintings progress through similar stages. There are various techniques that can assist in guiding you through the creative process. In this article, I aim to address both how to get off to the best start and how to approach the often elusive resolution. Let’s explore some practical painting advice from the beginning to the end of a piece of work.
- Start your painting with a ground
- Painting the background first
- Start with broader brush strokes
- Continue with broader brush strokes
- Work the surface holistically and use selective focusing
- Make a sector by sector to-do list
- Putting in the hours and loving the labour
- Work on more than one piece at a time
- Know when to stop
- And finally…
Consider yourself in the following situation, as I sometimes find myself. You’ve spent the entire evening tinkering with that painting you’ve been working on for the past few months. It’s still not finished. Sometimes it feels like one step forward and two steps back. Areas of the image constantly emerge that require ‘fixing’ unexpectedly as you work. It seems as though the painting will never be completed. Your mind is filled with self-doubt. You’re tired of looking at it now and you just want the damn thing to be done. Approaching the ‘finish line’ let alone crossing it seems almost impossible.
We’ve all experienced it, whether you work abstractly or representationally. I suspect that most of the painters you admire and respect have also encountered it, probably more often than you think. So what can we do to break this cycle of delay in our production process? I’m writing this primarily as a message to myself— a reminder of how to push through the morass that I often find myself caught in about two-thirds of the way through a piece of work.
There are several things I try to do when I get stuck at this stage. If you also experience this problem, you might find reading this helpful. This is primarily aimed at painters but, with some adjustments, could apply to most media, I’m sure.
Start your painting with a ground
Good finishing begins with thorough preparation from the outset. I’ve learned from too many mistakes that ensuring the surface is as you desire before starting is vital for a satisfactory finish. Remove that little raised area, wood chip, or hair that sticks to the surface while prepping your board or canvas. Do this now in the initial stage; I can guarantee it will become ten times more annoying the longer you leave it there. It will almost certainly coincide with the precise area you need to be perfectly flat for a focal point.
I’ve lost count of the number of times I’ve left a small blemish in place at the start while I’m rushing with energy to paint, only to be infuriated by its presence later when removing it risks damaging the surface where I’ve already created my image.
A ground is traditionally a coloured tone that is applied to your prepared surface before you start painting. It is often used as a mid-tone in much the same way that you might use toned paper. It can also serve as an underlying colour layer to enhance the effectiveness of the colours applied on top. There are numerous benefits to using a coloured ground, not least of which is the allowance it provides for omitting some areas from painting. For those with more experience, this may seem obvious, but many painters I’ve encountered have never experimented with a ground colour.
When my students first try this for themselves, it often reveals a new understanding. You can use any colour for a ground. You can choose a colour ground that contrasts with the overall colour palette of the final image. Opt for a cool ground in a warmer-hued image and vice versa.
Grounding the surface with colour is important for me in my technical and preparatory mental process. The ground colour I use has been developed through extensive trial and error over the years. I eventually settled on a hue that works best for the palette I most often use. It’s a greenish mid-grey ground colour, which is a blend of Raw Umber, Payne’s Grey, and white. I particularly appreciate the greenish tint beneath areas of painted skin. Using this ground helps me finish my work more quickly. It fills in the small gaps between brush strokes that might otherwise take a lot of time to cover. This, of course, makes it easier to complete the painting since you’re not labouring to cover specific areas of the canvas or board just for the sake of coverage.
There are numerous benefits to using a ground, so if you haven’t tried it yet, give it a go. Painting on a coloured ground will alter your experience. At the very least, you will notice a difference in how much more quickly the work begins to look complete.
Painting the background first
If you work with paintings that utilise a traditional pictorial space, then consider beginning with the background. It may seem straightforward, but it is sensible and can save a significant amount of time, especially if your painting features a complex foreground or overlapping shapes. The last thing I want to do is paint around ‘foreground’ objects (hair!) to fill in the background; this can be fiddly and time-consuming. It is also often preferable to have the background tone established so that you can judge your foreground tones against it.
Sargent for example would paint the background over the edges of his subject before blocking in the form [source (PDF) – this is one to download and read in its entirety especially if you are a portrait painter]. Bear that in mind there is qualification for this technique. In Sargent’s case, this approach results in masterful illusions of shapes emerging or receding through uses of soft and hard edges. Generally speaking, I find that beginning with the background generally makes for a better process and resolution.
Start with broader brush strokes
One of the few useful things I learned from my time at art school was to use larger brushes, especially at the beginning of a piece, and then to progress to smaller brushes later in the process. This method works well, as it not only speeds up the painting but also allows me to create larger surface marks that I can enjoy later, provided I manage to leave them intact. It’s a battle, and we all must resist the habit of adding details too early… or at all.
Continue with broader brush strokes
And now that I’ve started with a larger brush, I try to keep it going for as long as possible. “Try to use a brush that’s twice as big as the one you think you should be using,” someone once said to me. It’s good advice. Working with a larger brush for as long as you can prevents you from getting dragged into the too much detail too soon trap.
Work the surface holistically and use selective focusing
It can be beneficial to work the entire painting surface in a holistic manner. What I mean by this is to avoid focusing on one small area at a time. It is easier and quicker to fill in all of the basic imagery roughly before moving on to any level of detail. Rather than concentrate on detailing one small part of the surface and overworking it too early in the process, spread your efforts. This allows you to apply selective focus within the image.
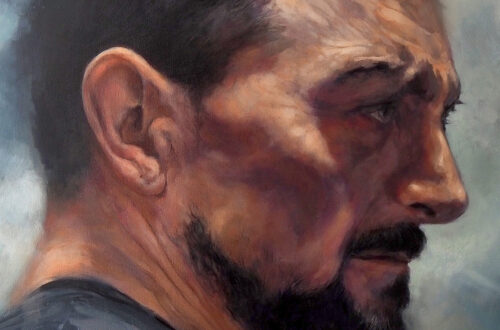
Not all of the surface needs to be worked up to a fine level of detail. Some painters have used and continue to use a photo-realistic level of detail throughout the entire image, which I admire. However, this is not necessary to create a successful painting. In my own work, there should be a distinction between an image that appears photographic and a painting. If a piece is indistinguishable from a photograph, then, in my opinion, it is probably better as a photograph.
For me, a successful painting should convey something beyond a photo-realistic representation. The combination of marks made by the artist’s hand, selective focusing, surface quality, and the physical presence of a painting all work together to create something that is distinct from a photograph. No disrespect to photography as an art form intended.
Approaching the surface holistically aids in rapidly bringing the image to life with a more cohesive look. This is particularly beneficial in the early stages, where you are trying to establish the mood and achieve the tonal composition. Remain mindful of this approach in the later stages as well. While you may be focusing on details and rendering specific areas of the image, it’s essential not to lose sight of the overall vision. Frequently step back from your work to create some physical distance between you and the surface. This practice will provide you with a clearer overview.
Make a sector by sector to-do list
When I’m in the latter half of a painting, I usually reach a stage where I can see particular areas needing refinement. It helps to make a list of these areas and what needs doing in each of them. This can assist in focusing and staying on task for the parts that truly require attention, rather than fiddling with areas that don’t need any more work. Otherwise, it can lead to overworking.
To achieve this, I often employ a grid technique, which involves splitting the composition into sectors and taking notes on what specifically needs to be completed in each area. Sometimes, I might also take a photo of my painting and bring it into Photoshop. There I can make more radical changes to uncertain areas to try to resolve them. After using these techniques, I usually have a much clearer picture of what still needs to be done.
Putting in the hours and loving the labour
In the final stages of the painting, I find that there is no alternative but to select a detail, get stuck in, and try to enjoy working on that area. This can be the most productive way to work. There are aspects I tend to avoid because I know they will require intense concentration and real effort. However, when I simply sit down and invest the hours into it, this proves productive, and I end up relishing the intensity of the concentration, where hours seem to disappear.
When it goes well, it becomes almost meditative. While it may seem daunting at first, learning this self-discipline is essential. We shall cover more of this in future articles.
Work on more than one piece at a time
It’s a straightforward strategy, but it doesn’t always work for me. I occasionally find it difficult to revisit a piece of work that has been lying dormant for a while. Some of my friends, however, swear by it. They find that when they become bored with the struggle of one piece, switching to another can rekindle their interest and make it easier to return with enthusiasm when the time is right. While it isn’t my usual approach, it’s a useful technique to have in your arsenal and perhaps to experiment with if you feel stuck on one painting.
Know when to stop
Often we continue to fiddle with a piece of work long after it is time to stop. At best, this is unproductive, and at worst, it can be damaging to the work. It is easy to overwork a painting when it has reached the point where no further work is needed. This is a challenge many artists face and must learn to manage over time. Recognise the signs of your fiddling and resist the temptation. Fiddling late in the process is fruitless; if you can avoid it, your paintings will be better off.
And finally…
Ask yourself if you are hiding the fact that you don’t want to finish the work because either you feel it is not up to standard or because you fear what needs to be done next. I have become aware of delaying tactics sometimes in my own practice, particularly towards the end of a piece. It takes good self-awareness to realise that you are doing this and the strength to follow it up with decisive action. If you find yourself using these tactics as I sometimes do, remember to check in with yourself and honestly evaluate why you are doing so and what the best step forward is.
Completing a painting can be a mental mountain to climb. If we equip ourselves properly and do the preparatory work, then our chances of success are significantly higher. Good luck.